If it wasn’t for Sarah, I wouldn’t be married to Him Outdoors. She’s one of my oldest friends and in a rash moment nearly 20 years ago she invited me to a house party where I was introduced to one of her brothers. Our eyes met over a drain he was digging in their father’s garden and the rest, dear reader, is history. (I should say the digging wasn’t part of the festivities, it preceded them. There was a long queue for the bathroom that day.)
She was telling me about another party she threw recently, the sort where people drift in and out over many hours, often with their kids in tow. The food needed to appeal to all generations, be scoffable in a couple of bites and crucially, have staying power.
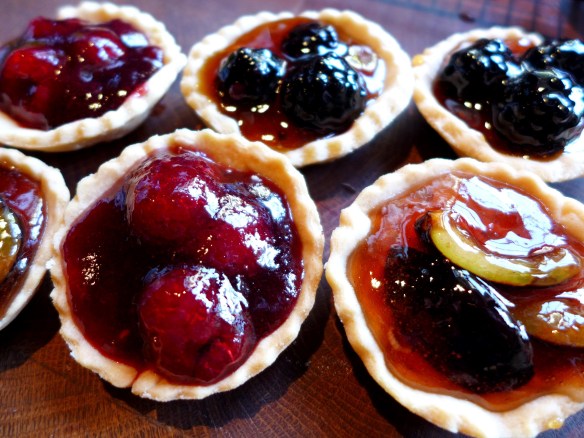
These … or a variation of them … were what she served as dessert. They are smart little tarts, setting tangy bites of fresh fruit in a fruit conserve, within a crisp pastry shell. High Street bakery chains do something similar but not half as well.
The appearance is improved if you use a clear jelly to set the fruit, rather than a jam. I used raspberry and redcurrant with the fresh raspberries, quince jelly with the plums and rosehip jelly for the blackberries (on the basis that blackberries and rosehips ripen at much the same time, although I felt this final combination was too sweet).
If you don’t want to make your own sweet shortcrust, ready-made is fine. I used shallow vintage patty pans but any jam tart tin will work.
Jewelled Berry Tartlets
Ingredients:
350g sweet shortcrust pastry (see bottom of this post)
The berries or fruit of your choice, 1-3 pieces per tartlet depending on size, sliced if necessary
Caster sugar, 3 tspn
Lemon juice
The jellies of your choice, 5-6 tbsp of each, assuming 3 varieties
Method:
 Put the different fruits in a series of bowls and sprinkle each with a teaspoon of sugar. Set aside for a few hours to let the juices run. NB: if you’re using raspberries, don’t macerate them or they’ll go soggy.
Lightly grease your jam tart tins then line with the pastry and chill for 15 minutes while the oven heats up – set it to 180C/350F/Gas Mark 4. Prick the base of the pastry cases all over with a fork. Line with baking parchment and fill with ceramic baking beans or dried pulses.
Bake for about 10 minutes or until the pastry is firm, then remove the beans and lining paper and cook for about 5 minutes more, until golden brown. (They look paler in the pictures but were more biscuity than they appear.) Please bear in mind your oven will vary from mine, so check a little earlier in both cases. When they’re done, remove from the oven, cool for a few minutes in the tins then carefully remove to a wire rack to cool completely.
Strain the fruits, reserving any juice. Put the juice with the corresponding jelly in a series of pans on a low heat and melt the jam until it is smooth and lump-free: adding a small squeeze of lemon juice will help it re-set. Remove from the heat and allow to cool enough to thicken slightly, then pour over the fruits in their bowls.
Put a spoonful in each of the tartlet cases, making sure you distribute the fruit equally. Allow the jelly to cool and set before serving.


Tarts look perfect Linda. Perfect consistency. When I was very young I have been known to get up at 3am, go into the fridge and eat all of the strawberries out of my mothers tarts that were done for the followings day’s events. I’d have done the same with these
Haha, your mother must have been livid! Mine would have absolutely leathered me if she’d caught me doing that. Thanks for the kind words. Lx
Lovely pics! (of you and the tarts). x
Haha, the notoriously private Him Outdoors said he didn’t mind me posting them as he’s now so grey (after years of marriage to me) that no-one would recognise him. 😀